




The right record player stand with storage should fully support your turntable, hold your records without packing them too tightly, and provide practical space for the other components in your listening system. The correct size depends on the stand’s internal storage dimensions, equipment clearance, and individual shelf limits—not its exterior size or advertised record capacity alone.
A dedicated stand becomes useful when an ordinary table or bookshelf cannot keep the turntable stable while organizing records, audio components, power supplies, and cables in one accessible area. The following steps will help you calculate the storage you need, measure your equipment, and choose a layout that works for your complete system.
Decide What Your Stand Must Hold
Start with your complete listening setup, not just the turntable and records. Include any phono preamp, amplifier or receiver, headphone amplifier, streamer, CD player, cleaning supplies, spare sleeves, power strip, adapters, and external power supplies that need a permanent place.
Record the width, depth, height, and weight of each item, along with the shelf where you expect to place it. Separate equipment you already own from possible future additions. This leaves room for realistic upgrades without making you choose an unnecessarily large stand for equipment you may never buy.
| Item | Width and Depth | Height | Weight | Planned Position |
|---|---|---|---|---|
| Turntable | Include all feet | Include open dust cover | Product weight | Top surface |
| Amplifier or receiver | Include plugs and knobs | Include feet | Product weight | Open shelf |
| Records | Measure as a group | Check record format | Estimate by sample | Vertical compartment |
| Power supplies | Include cable bends | Allow secure placement | Combined weight | Rear or lower storage |
A purpose-built stand can give the turntable a stable surface while keeping records and connected equipment organized nearby. Once you know which items need to share the unit, compare record player stands with vinyl storage by their internal layouts rather than exterior size alone.
Calculate How Much Vinyl Storage You Need
An advertised record capacity is a useful starting point, but it may not match the way your collection uses space. Gatefold albums, box sets, thick jackets, and protective outer sleeves take up more room than standard single-disc records. Two collections containing the same number of albums can therefore require different storage widths.
Estimate Your Records’ Storage Width
Choose a representative sample of about 20–30 records. This range is usually large enough to reduce the influence of one or two unusually thick jackets while remaining quick to measure.
Match the sample to your collection. For example, if approximately one-quarter of your albums are gatefold editions, include a similar proportion in the sample. Measure unusually large box sets separately because their thickness can distort the estimate. If you own fewer than 30 records, measure the full collection instead.
Stand the selected records together as they would be stored and measure their combined width. Then calculate:
Estimated storage width = Sample width ÷ Sample quantity × Total record quantity
For example, if 24 representative records occupy 8 inches and you own 90 records, your collection requires approximately 30 inches of storage width.
This result will usually be more useful than assigning one assumed thickness to every album.
Check Each Compartment’s Interior Dimensions
Compare your estimated storage width with the clear internal width of the record compartments, not the stand’s overall width. Check the clear height and depth as well. Dividers, doors, hinges, raised edges, and angled sides can make the usable opening smaller than the furniture’s exterior dimensions suggest.
If a stand uses several record compartments, check each section separately. Confirm that your largest records and box sets can pass through the compartment openings, and plan how the collection will be divided rather than relying only on the combined width.
Reserve Browsing Space for Your Records
Do not choose a compartment that your current collection will fill from edge to edge. For one continuous storage section, add approximately 2–3 inches (5–8 cm) to the measured width of the records. If your albums occupy 18 inches, for example, look for at least 20–21 inches of clear internal width.
This extra room allows you to move albums aside, read the spines, and remove one record without pulling several neighboring jackets forward. With multiple narrower compartments, make sure each section leaves enough space for your fingers to reach and separate the jackets comfortably.
If you expect the collection to grow, estimate how many records you are likely to add over the next few years and include their approximate width in the calculation. This helps you choose sufficient capacity from the beginning instead of outgrowing the stand soon after purchasing it.
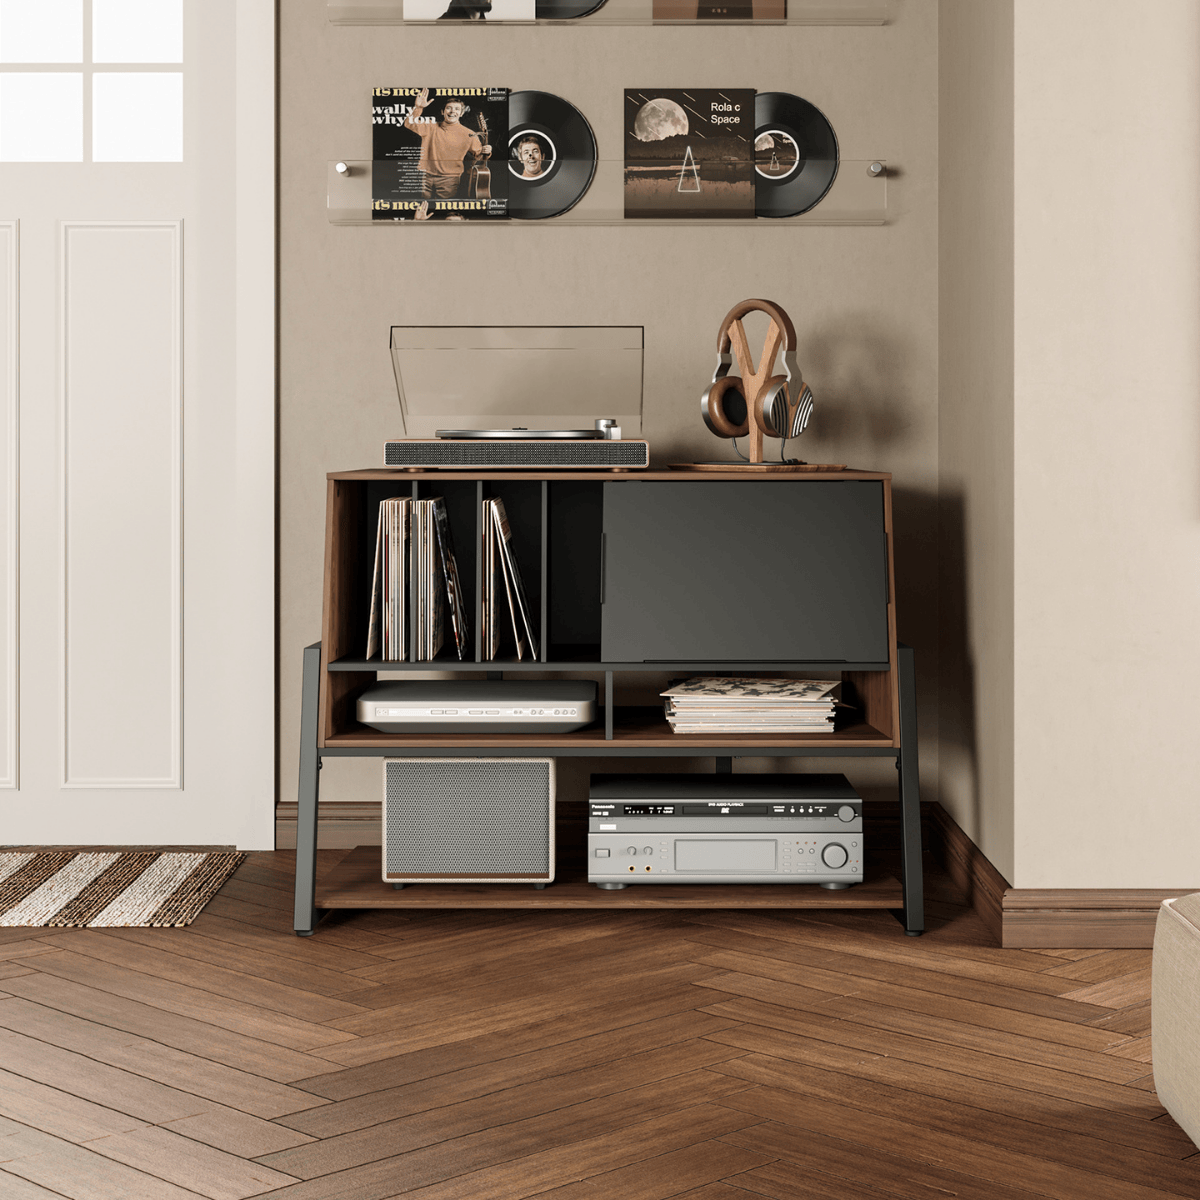
When comparing your calculation with an actual design, look at how the stated capacity is distributed. The Eiffel RS10 record player stand, for example, uses four dedicated vertical compartments to hold up to 120 records and supports 7-, 10-, and 12-inch formats. Its overall structure measures 42.5 × 21.5 × 30.7 inches (about 108 × 54.6 × 78 cm), with a top surface for the turntable and two additional open levels for audio equipment and accessories. Adjustable foot pads help keep the stand stable on slightly uneven floors, while separately sold casters can be added if you expect to move the setup between rooms.
This layout shows how record storage and equipment space can be incorporated into the same unit while allowing you to choose between a stationary or movable setup. However, “up to 120 records” remains an estimate, so compare the compartments with the actual thickness and format mix of your collection rather than treating the advertised number as a guaranteed fit.

Measure Equipment Fit and Clearance
Once you have calculated how much space your records require, turn to the equipment that will share the stand. Measure whether each component can fit on its intended surface while leaving enough room to use the controls, open the turntable dust cover, connect the cables, and release heat.
Check Turntable Size and Operating Height
Measure the turntable’s complete width and depth, making sure every foot will rest fully on the top surface. Include the additional rear space required by RCA plugs, the grounding wire, and the power connector.
Open the dust cover and measure how far it extends upward and backward. A turntable may fit on the top panel while still sitting too close to a wall for the cover to open properly.
Also consider the height of the top surface. You should be able to place a record, move the tonearm, and reach the controls comfortably without repeatedly bending too low or raising your arms awkwardly. Because turntable designs and user heights vary, compare the proposed surface height with the way you operate your own player.
Measure Every Audio Component
Measure each amplifier, preamp, receiver, streamer, or CD player at its widest, deepest, and tallest points. Include projecting knobs, feet, antennas, and connected plugs rather than measuring only the main casing.
Compare these measurements with the clear width, depth, and height of the intended shelf. If a stand has doors or raised front edges, confirm that the equipment can pass through the opening and that its controls remain accessible after placement.
Map every component to a specific shelf before buying. This makes it easier to identify conflicts such as two tall components competing for the same open section or a deep receiver leaving too little room for rear connections.
Allow Space for Cables and Airflow
Leave enough space behind each component for plugs to connect without pressing against the wall or forcing cables into sharp bends. Power adapters and power strips should rest securely rather than hang from their cords.
For amplifiers and receivers, keep all visible vents unobstructed. As a practical starting point, aim for approximately 4 inches (10 cm) of open space above heat-producing equipment where the layout allows. Open sides and an open back also make it easier for heat to escape. Avoid stacking another device directly over ventilation openings simply to fit more equipment onto one shelf.
| Area | What to Measure | Suitable Fit |
|---|---|---|
| Record compartment | Clear internal width, height, and depth | Records remain upright, with about 2–3 inches (5–8 cm) of browsing space in each compartment |
| Top surface | Turntable base, feet, controls, and open dust cover | All feet are supported and the dust cover opens freely |
| Equipment shelf | Full component width, depth, and height | No overhang or blocked controls |
| Rear clearance | Plugs, cables, grounding wire, and power supplies | Connections fit without pressing against the wall or creating sharp bends |
Verify Each Shelf’s Load Capacity
After confirming that everything fits, check whether each shelf can support the weight planned for it. A stand’s total capacity does not necessarily show how much weight its individual shelves or record compartments can hold.
Use the manufacturer-listed weight for each electronic component. For records, weigh a representative group and use the result to estimate the weight assigned to each compartment. Add the weight of every item sharing the same shelf, including accessories, and compare the total with the published limit for that specific level.
Do not assume that every shelf has the same rating. A strong top panel may support considerably more than a narrow middle shelf. A compact amplifier may also be heavy despite occupying little space, while a dense row of records can create substantial weight across a compartment.
When two possible arrangements both remain within the shelf limits, placing heavier equipment lower can help keep the stand’s center of gravity closer to the floor. The lower position must still provide enough operating, cable, and airflow clearance for that component.
After assembly and loading, check that the frame remains level, every foot stays in firm contact with the floor, and no shelf bows or connection begins to loosen.
Choose the Right Overall Layout
If you want the complete system in one unit, choose a layout that passes all four checks before purchase:
- The turntable is fully supported and its dust cover opens freely.
- The record compartments provide sufficient storage and browsing space.
- Every audio component has suitable operating, cable, and airflow clearance.
- The planned load remains within each shelf’s stated limit.
If one unit cannot satisfy all four conditions, compare a larger stand with an intentionally divided layout before buying. For example, you might place the turntable, amplifier, and frequently played albums in the primary music area while using coordinated storage for the rest of the collection. This should be a planned room-layout choice, not a last-minute response to discovering that a newly purchased stand is too small.
Speakers can also be placed on separate speaker stands when keeping them on the same furniture would use needed shelf space or transfer vibration to the turntable. Once the practical measurements are settled, these vinyl record storage and display ideas can help you arrange the listening area without repeating the capacity calculations above.
This system-first approach reflects how FITUEYES designs audiovisual furniture for different homes and listening habits. The goal is not to fit the greatest possible number of items into one cabinet, but to give the turntable, records, equipment, and cables enough room to work together comfortably.

FAQs
1. Where Should a Record Player Stand Be Placed?
Choose a firm, level part of the floor where the loaded stand does not rock. Thick or soft carpet is not automatically unsuitable, but it may reduce stability, so check the level again after adding the turntable and records.
Anti-vibration foot pads can be placed beneath the stand or turntable to help reduce vibration transfer. Keep speakers on a separate surface where possible, especially if higher listening volumes cause feedback, muddy bass, or skipping.
2. Should Vinyl Records Be Stored Upright?
Yes. Vinyl records should be stored vertically because horizontal stacking places continuous weight on the records at the bottom, while unsupported leaning creates uneven pressure across the discs and jackets. Over time, these conditions can contribute to warping, ring wear, and damaged covers.
Use dividers or bookend-style supports to keep a partly filled row upright. The supports should prevent strong leaning without pressing the albums together so tightly that they become difficult to remove.
3. Do I Need a Professional Assembly?
Most record player stands do not require professional assembly when they include labeled parts, the necessary hardware, and clear step-by-step instructions. Simple models can often be assembled in around 30 minutes, while larger stands with several compartments or doors may take longer. Before buying, check the required tools, product weight, and whether another person is recommended for lifting or positioning the completed stand.
FITUEYES record player stands are designed for home assembly without specialist installation. If you are considering the RS10, you can review the Eiffel RS10 installation manual before starting. If you need help understanding the instructions, confirming a part, or checking a product specification, the FITUEYES support team will respond within 24 hours on business days.